Under some circumstances Windows Server will automatically select a network profile for you which does not match your needs. It’s not very clear how to change it between public and private within the network and sharing center. In my opinion the easiest way is to use Windows Powershell to change network profile on Windows Server 2016.

Here is how to change the profile from public to private for your network connection on Windows Server 2016. There are several methods of doing this but I find the GUI method to be very unclear. So here I am going to document how to change the network profile using Powershell.
How to change network profile on Windows Server 2016 to Private using Powershell
- Open Powershell
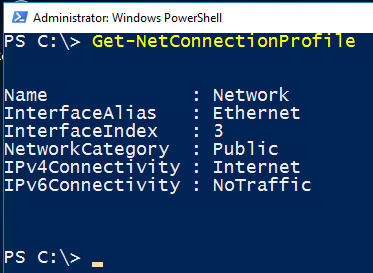
- Type Get-NetConnectionProfile
![Image showing Powershell to get the current network profile]()
- If you have only one network connection you can change the profile to private by typing:
Get-NetConnectionProfile | Set-NetConnectionProfile -NetworkCategory Private
![Image showing how to change network profile on Windows Server 2016 from Public to Private]()
- If you have multiple network interfaces and would like to change a specific adapter use the Interface Index Property like this:
Set-NetConnectionProfile -InterfaceIndex 3 -NetworkCategory Private
- You can then verify the change has taken place by running Get-NetConnectionProfile again:
![Image showing Windows Server 2016 Network Connection with a Private Profile]()


Obviously you can also use this method to switch from a private network profile to a public network.
The post How to change network profile on Windows Server 2016 appeared first on Tachytelic.net.